 Your Bizarre Adventure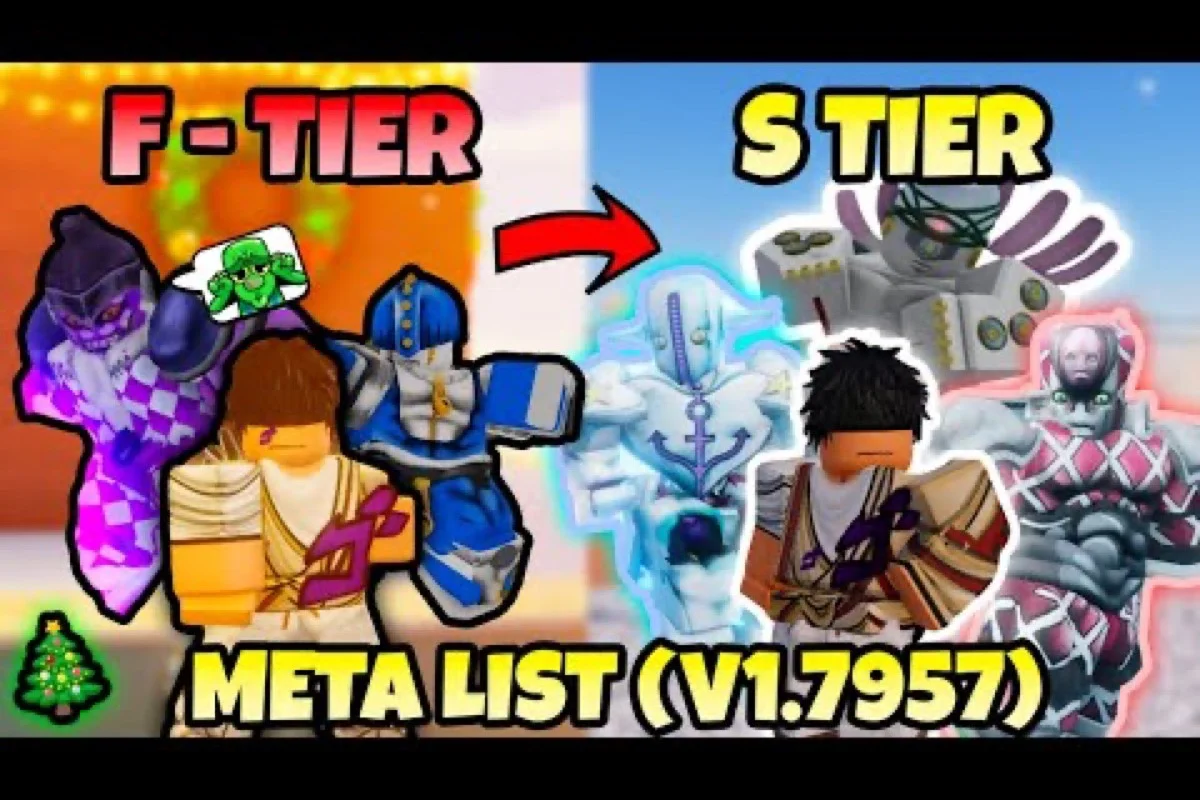
The right YBA PvP combos turn ranked matches from a coin flip into a controlled route, and once you understand the rhythm of bread-and-butter routes with Shadow The World, Killer Queen, and Six Pistols, climbing from Iron to Diamond stops feeling like a grind. Ranked mode runs on a 9-division ladder with 4 sub-tiers each, MMR-based matchmaking, and seasonal resets every four months, so players who build combo muscle memory early are the ones who survive placement matches and start earning chest rolls. This guide breaks down how to construct, practice, and deploy winning sequences in both 1v1 and 2v2 lobbies without copying JoJo anime choreography that does not exist in the actual game.
Ranked Mode Foundations: How the Ladder Actually Works
Before combo routes matter, you need to understand the scoring layer they sit on. The official Trello board documents a 9-division ranked ladder. Iron, Bronze, and Silver open the climb; Gold and Platinum sit in the middle; and Diamond, Crusader, Requiem, and Ascended close it out — with 4 sub-tiers per division. Every promotion tier requires crossing 100 Rank Points, and dropping below 0 RP costs you a sub-tier, which means risky plays cost more than they save until you have a combo plan that can convert one opening into a confirmed hit.
| Division | Sub-Tiers | RP Rule | Notes |
|---|---|---|---|
| Iron | I-IV | +100 RP per promotion | Placement floor for most new accounts |
| Bronze → Gold | I-IV each | -1 RP per loss, +15-30 RP per win (scales with MMR gap) | The grind band where combos decide tempo |
| Platinum → Diamond | I-IV each | Higher MMR = larger RP swing | Where opponent skill spikes |
| Crusader → Ascended | I-IV each | Endgame bracket; MMR floors exist | Reserved for top-percent players |
Seasons reset every four months (January, May, September), and each season begins with a Placements phase. You cannot lose RP during placements, and wins count for more, which gives you a free window to test YBA PvP combos against real opponents before MMR locks in. The official Roblox page places Season 1 at May 2024, so Season 1 of 2026 would land in September, with the current cycle running through January 2027. Past ranked placement (Iron, Bronze, Silver, or higher) seeds you one full division below where you ended, so the climb is shorter for veterans and longer for first-timers.
Matchmaking uses MMR, not your displayed sub-tier, and will not pair you against opponents more than 2 full divisions away. That is why a fresh ranked account will see chaotic opponent quality during placements: the system is calibrating. Once your MMR stabilizes, the lobbies you face in YBA ranked 1v1 will reflect your actual combo execution and defensive reads, not your badge.
Maps rotate through a fixed pool of 11 ranked locations: The Joestar Mansion, Windknight's Lot, Skeleton Heel Stone, Dio's Mansion, Dio's Coffin Room, Cairo's Bridge, The Morioh Station, San Giorgio Maggiore Basement, The Colosseum, Green Dolphin Street Prison Courtyard, and Devil's Palm. Each map shifts the spacing and corner-closer availability, and certain combo routes (Six Pistols bullet coverage, Star Platinum rush punchers) gain value on open Coliseum maps and lose value on Dio's Coffin Room corridors. If you want a deeper map-by-map read, the ranked map pool breakdown covers spacing differences across all 11 ranked stages.
A subtle mechanic worth noting: Loot Points tick up after every ranked win, and every 20 Loot Points grants a random chest, which is the only cosmetic reward track in YBA ranked mode. Chest rolls can include stand skins, item cosmetics, and other visual rewards that have no effect on combat. Treat chests as a side benefit, not a goal, because the fastest YBA how to rank up route is still focused on combo consistency rather than chest farming.
The Three Core Pillars of Effective Combo Building
Every working YBA PvP combo in ranked mode is built on three pillars: a reliable opener, a punish extender, and a safe disengage. Skipping any of the three is why most players stall in Bronze and Silver, because they win neutral exchanges but cannot convert openings into round-ending pressure.
Pillar 1: A Reliable Opener
An opener is the move that catches a grounded opponent off-guard or beats their defensive read. In ranked mode, openers fall into three categories: ranged pokes (Six Pistols bullets, Magician's Red flame columns), dash-through mixups (Star Platinum rush punchers, The Hand erasure rushes), and block-bypass tools (Sticky Fingers zipper yanks, Beach Boy hook pulls). The opener you pick depends on your Stand and the map's spacing.
The most important rule: your opener must beat the opponent's parry timing on a read, not on reaction. Parry (the same F key as block, with tighter timing) reflects heavy attacks and R-move startups, which means spamming an opener on cooldown gets you parried for free. Instead, vary your opener timing and angle, and condition opponents to expect it on one rhythm before you break the rhythm on the round-deciding exchange.
Pillar 2: A Punish Extender
Once the opener lands and staggers the opponent, you need a follow-up that capitalizes on the hitstun before they can block, parry, or pose-cancel. This is where the actual "combo" lives. Good punish extenders either chain into another damaging move with minimal animation cancel, or apply a status effect (ragdoll, freeze, burn) that locks the opponent out of defensive options.
Execution-based moves are the most reliable punish extenders in the game. The official Trello lists 10 confirmed Execution moves: Road Roller, Crazy Beatdown, Impale, 7 Page Muda, Arrivederci Beatdown, String Beatdown, Dino Virus, Ora Beatdown, Friction Beatdown, and Punishment. These moves scale their damage upward against opponents at lower HP, with String Beatdown documented as 44 damage at 100% HP, 88 at 50%, and 105 at 30% (this is one of the few officially published damage values; the official Trello does not publish full damage tables for other moves, so do not invent them).
Pillar 3: A Safe Disengage
After extending a punish, you need a way to back off without trading HP. Two safe-disengage tools exist: Posing (P key, which speeds up HP regeneration significantly) and a controlled dash away. Veteran ranked players always end a combo string with either a P-cancel into pose or a dash-back into spacing, because greed at the end of a confirmed string is how you get parried and lose the round you were about to win.
| Pillar | Tool Category | Best Stand Examples | Common Mistake |
|---|---|---|---|
| Opener | Ranged poke / dash-through | Six Pistols, Star Platinum | Spamming on cooldown (gets parried) |
| Punish Extender | Execution / status move | Killer Queen, Whitesnake | Dropping the chain too early |
| Safe Disengage | Pose (P) / controlled dash | Universal | Greeding for one more hit before resetting |
For a fuller breakdown of how block, parry, and Execution damage interact during punish windows, the ranked combat fundamentals guide maps the 5 block types (Blockable, Heavy Block Damage, Guardbreak, Block Bypass, Ignores Block, Chips Block) to the moments when each pillar applies. The interaction between those three systems is what makes a YBA ranked guide worth reading rather than a generic "git gud" list.
Stand-Specific Combo Routes: Shadow The World, Killer Queen, and Six Pistols
Once you internalize the three-pillar structure, the next step is mapping it to specific Stands. Below are three bread-and-butter routes that work in both YBA ranked 1v1 and YBA ranked 2v2, drawn from the 46 officially listed Stands on the Trello board. The Stand list is the authoritative source; if a Stand is not on that list, its moves do not exist in the game, so do not chase combo guides for Stands that are JoJo canon but not YBA content (for example, Sticky Fingers, Star Platinum, and The World are all on the list, but other Part 3-6 Stands are not).
Shadow The World: The Space-Control Route
Shadow The World is an evolved Stand obtained by applying a Stand Virus Capsule (the Enya The Hag quest reward) to The World. It trades some raw burst for better time-stop utility and pressure tools. The bread-and-butter route looks like this:
-
Opener: Approach with a dash cancel into a medium poke, conditioning the opponent to expect a block rather than a mixup.
-
Punish Extender: On read, trigger the Stand time-stop, land two confirmed hits, and chain into a heavy Execution move (Ora Beatdown is the most reliable, since it is on the official Execution list and the only one confirmed to scale on low-HP targets in the same way as String Beatdown).
-
Safe Disengage: Pose-cancel immediately after the Execution lands. The P-pose heals faster than most opponents can chase, and your Stand is back in neutral before they re-enter spacing.
This route works in YBA ranked 1v1 because the time-stop window is long enough to lock down a single target, and it works in YBA ranked 2v2 if your partner is holding the second opponent at range while you commit to the kill. The biggest mistake Shadow The World players make is using the time-stop offensively without setting up the opener first, which causes the time-stop to whiff and the player to eat a parry counter-hit.
Killer Queen: The Touch-Detonation Route
Killer Queen is a Part 4 Stand accessible via Mysterious Arrow (with Worthiness), and its evolved form Killer Queen: Bites The Dust is obtained via Requiem Arrow (requires Prestige I and Worthiness). The base Killer Queen combo route is shorter and more punishable but higher reward per touch:
-
Opener: Land any touch (primary, secondary, or coin toss). Every confirmed touch applies a touch mark.
-
Punish Extender: Detonate the touch mark with the Stand's heavy move. If the opponent is at or below 50% HP, the detonation will often combo into a Sheer Heart Attack chase, which is unblockable while active.
-
Safe Disengage: Sheer Heart Attack either connects (and you reset) or gets reflected, in which case you dash-cancel into pose to recover.
The route is strong in YBA ranked 1v1 because a single confirmed touch wins the round against low-HP targets, and a missed detonation only costs a cooldown. In YBA ranked 2v2, the route is more situational because opponents can switch target focus onto you while the touch mark is active, which is why most 2v2 teams run Killer Queen as a secondary finisher rather than a primary combo lead.
Six Pistols: The Bullet-Volume Route
Six Pistols is the YBA name for the Part 5 Stand whose original JoJo name is filtered by Roblox. It is an arrow-rolled Stand in the official list, and its defining trait is auto-aimed bullets that track targets through walls. The combo route is built on volume rather than single-confirm:
-
Opener: Fire the bullet spread from medium range. Six Pistols' auto-aim applies a tracking projectile that forces the opponent to dodge rather than block.
-
Punish Extender: As they dodge, dash forward and land a melee confirm during the bullet-stagger window. Chain the melee into a close-range Execution if available.
-
Safe Disengage: Pose-cancel after the Execution. Six Pistols' reload window is the most dangerous part of the kit, and pose-canceling through it avoids parry punishes.
This is the safest YBA PvP combo for newer ranked players because the auto-aim bullets do most of the opening work for you. It also scales well into YBA ranked 2v2 because bullets do not damage your gang members (per the official Trello note that certain skills, including Six Pistols' auto-aim, skip allied players), so you can fire freely without trading into your partner.
| Stand | Route Type | Best Mode | Key Execution | Risk |
|---|---|---|---|---|
| Shadow The World | Time-stop confirm | 1v1 / 2v2 cleanup | Ora Beatdown | Time-stop whiff = parry punish |
| Killer Queen | Touch-detonate | 1v1 finisher | Sheer Heart Attack | Detonation can be reflected |
| Six Pistols | Bullet-volume stagger | 1v1 / 2v2 primary | Stand heavy | Reload window is punishable |
For newer players still building neutral game, working through the starter Stand and tutorial breakdown before committing to ranked helps a lot, because ranked MMR is unforgiving during the first 5 placement wins and the system reads those early games heavily.
Ranking Up Fast: Placement Strategy and Loot Optimization
YBA how to rank up is really two questions stacked: how to clear placements efficiently, and how to climb the post-placement ladder. The two phases need different combo habits, and treating them as the same thing is why many players plateau at Gold or Platinum.
Placement Phase (First 5 Wins)
Placement matches do not cost RP on loss, and win bonuses are inflated, so the goal during placements is to play 5 clean matches rather than 5 aggressive ones. Pick one Stand (Six Pistols is the easiest), one route from this guide, and run only that route. Do not switch Stands between matches, do not experiment with new openers, and do not chase risky Execution punishes when a safe poke would win the round.
The placement floor for most new accounts is Iron I, so do not be discouraged if you end placements there. The MMR system is calibrating, and your actual sub-tier will adjust within 10-15 matches after placements end.
Post-Placement Climb (Iron → Diamond)
After placements, the RP economy tightens: wins give 15-30 RP depending on MMR gap, and losses subtract. This is where the three-pillar structure pays off, because every round you win cleanly (opener → extender → safe disengage) costs the opponent a chunk of their MMR rating. Stack clean wins and you climb; stack risky losses and you stall.
| Phase | Goal | Best Stand Type | Combo Habit |
|---|---|---|---|
| Placements (1-5 wins) | Survive calibration | Easy-to-execute (Six Pistols) | One route, no swaps |
| Iron → Silver | Build muscle memory | Bread-and-butter Stand | Repeat three-pillar structure |
| Silver → Gold | Punish parry-happy players | Faster opener Stand (Killer Queen) | Vary opener timing |
| Gold → Diamond | Read opponent habits | Pressure Stand (Shadow The World) | Setups into Execution punishes |
Two habits separate Gold players from Diamond players: opener variety, and pose-cancel discipline. Openers must vary in timing and angle once you reach Gold, because opponents at that tier can read repeated openers within 2-3 rounds and parry them on reaction. Shadow The World and Star Platinum: The World (obtained via Requiem Arrow from base Star Platinum) are the most natural Stands for opener variety, because their toolkits include both ranged and dash-through openers.
Pose-cancel discipline is the second separator. The P key accelerates HP regeneration dramatically, and Gold players often forget to use it after a confirmed combo, which forces them into losing HP trades they could have avoided. If you are running Spin as a fighting style, the spin dashes pair especially well with pose-cancel windows, and the Spin fighting style guide covers the cancel routes that work best for ranked tempo.
Prestige and the Loot Track
Prestige is a separate progression layer from ranked, but the two interact in one specific way: certain combo routes (Requiem Arrow evolutions, Bites The Dust, Shadow The World) require Prestige I, and the official Trello caps Prestige at Lv50 (Prestige 3) with each prestige level costing $5,000 plus a max-level character. If you want access to the evolved Stand combos that win in Diamond and above, you will need to prestige first. The Prestige leveling roadmap walks through the Max Level → $5,000 → Prestige Master Rin loop in detail.
Loot Points tick up after every ranked win regardless of outcome tier, and the official Trello notes that every 20 Loot Points grants a random chest, which can contain stand skins, item cosmetics, and other visual-only items. Chest contents have no effect on ranked performance, so the chest track is a side goal, not a climb strategy.
Season Reset Cadence
Seasons reset every 4 months (January, May, September), and your previous-season division seeds you one full division below on the new ladder. Season 1 launched in May 2024 according to the Roblox event page, so the current cycle as of October 2026 is mid-season, with the next reset landing in January 2027. Use the late-season window to push for Diamond or higher, because your placement seeding will be better and the climb in the next season will be shorter.
Common Mistakes That Stall Ranked Climb
Even with the right combo routes, certain habits stall your climb between Silver and Platinum. These are the most common offenders, drawn from community-reported trends rather than official balance notes (the Trello board does not publish balance patch frequency).
-
Greeding the combo string: Trying to land one more hit after the Execution punish. Greed costs more rounds than it wins because it skips the safe-disengage pillar and feeds parry punishes.
-
Switching Stands every match: Each Stand has a different opener timing, and switching mid-session resets your muscle memory. Pick one bread-and-butter route and grind it for at least 20 matches before considering a swap.
-
Ignoring map spacing: A Six Pistols bullet-volume route plays very differently on the open Colosseum map than on the corridor-heavy Dio's Coffin Room. Treat each map as a separate combo environment.
-
Skipping pose-cancel: Posing after a confirmed hit is the difference between trading HP and resetting clean. Players who skip P-cancel spend more time in losing HP races than they need to.
-
Chasing Execution punishes at full HP: Execution damage scales with how low the opponent's HP is, and the official numbers for String Beatdown (44 at 100%, 88 at 50%, 105 at 30%) confirm this. Setting up a 1v1 duel to land a finisher at 30% HP is far more efficient than forcing Execution punishes at full HP, which often whiff or trade.
The ranked system rewards consistency over highlight reels, and the players who climb fastest are the ones who win neutral exchanges, convert them into confirmed Execution punishes, and pose-cancel out cleanly. That is the entire YBA ranked guide in one sentence, and every bread-and-butter route above is just a different way of executing the same three-pillar structure.
Frequently Asked Questions
What is the fastest way to climb in YBA ranked 1v1?
Pick one bread-and-butter Stand (Six Pistols is the easiest), run only the three-pillar route for that Stand, and avoid Stand swaps for at least 20 matches. Consistency converts more neutral wins than flashy plays, and your MMR will climb faster than your displayed sub-tier during the first 15 post-placement matches.
Do combo routes work the same in YBA ranked 2v2?
Most routes do, but gang-friendly Stands like Six Pistols (whose auto-aim bullets skip allied players per the Trello) scale better into 2v2 than single-target Stands like Killer Queen. Coordinate with your partner so one of you holds the second opponent at range while the other commits to the Execution punish, and avoid doubling the same target at the same time, which wastes combo damage.
How do Loot Points and chests work in ranked mode?
Every ranked win grants Loot Points, and every 20 Loot Points opens a random chest. Chests can contain stand skins, item cosmetics, and other visual items that have no combat effect, so the chest track is a side benefit, not a climb strategy.
What Prestige level do I need for the best YBA PvP combos?
Most evolved-Stand combos (Shadow The World, Killer Queen: Bites The Dust, Star Platinum: The World) require at least Prestige I, and the official Trello caps Prestige at Lv50 (Prestige 3). If you want the evolved-Stand routes that win in Diamond and above, plan to prestige before grinding past Gold.
Does map choice matter for combo execution?
Yes. The 11 ranked maps rotate the spacing and corner-closer availability, and certain routes (Six Pistols bullet volume, Star Platinum rush punchers) gain value on open Coliseum maps while losing value on corridor-heavy maps like Dio's Coffin Room. Treat each map as a separate combo environment rather than running the same route on every stage.